Sonoscan, Inc.

Designer & Manufacturer of Acoustic Microscopes for Nondestructive Component Inspection.
Consultant / Service Provider, Manufacturer
Acoustic Microscopes use high frequency ultrasound to nondestructively detect defects. A technique that is complimentary to X-ray analysis, but is more sensitive to bonding between materials, cracks and delaminations hidden within devices.
Sonolabs (Laboratory Services), providing contract inspection programs including; Ceramic Capacitor Certification, JEDEC Plastic Package Moisture Qualification, Die Attach MIL-STD-883 Qualification, Component Failure Analysis and Material Characterization.
Sonoscan Introduces Time-Saving STAR(tm) Module
Elk Grove Village IL -- Simultaneous Thru-scan And Reflection (STAR scan) technology has been introduced by Sonoscan, the developer and maker of acoustic micro imaging systems. The time-saving module performs both Thru-scan� and reflection-mode imaging during the same scan. Thru-scan imaging, long popular with users of Sonoscan C-SAM� systems for quick spotting of internal defects, uses a transducer on either side of the sample. The top transducer pulses very high frequency ultrasound into the sample; the bottom transducer reads the exiting ultrasound. Gap-type defects (cracks, delaminations, disbonds) block ultrasound from reaching the bottom transducer. The image shows internal structure and the acoustic shadow of the defect - but not its depth. Reflection-mode imaging, by contrast, uses a single topside transducer which pulses ultrasound and receives return echoes. Internal features and defects are imaged, but the varying arrival time of return echoes indicates their depth. Thru-scan imaging tells a failure analyst that a defect is present, while reflection-mode imaging tells the analyst the defect�s vertical position. STAR makes it unnecessary for the analyst to lose time by switching from one mode to the other and having to flip the sample over to rescan it. In a plastic integrated circuit (IC) package, the die attach might be delaminated from the top side of the die paddle - a serious defect. Alternately, molding compound might be delaminated from the bottom side of the die paddle - a less troublesome anomaly. Using the two-mode STAR system, the analyst can: 1) tell that a defect exists, and 2) instantly evaluate its location and significance.
Sonoscan, Inc. Postings
4 products »
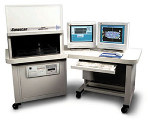
Sonoscan DF2400 Automated CSAM
FACTS²™ DF2400™ C‑SAM® Automated In-line Inspection Tool for Defect-Free Production Without Sacrificing Throughput The FACTS²&trad...
Failure Analysis and general laboratory investigations of electronic components and devices, plus material analysis. Ideally suited for high precision scanning of high density devices....
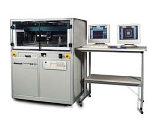
Similar to D-9000, featuring a larger scanning area (24" x 24"). Ideally suited for large printed circuit boards and multiple tray analyses....
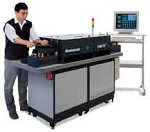
Ideally suited for repetitive screening of components in JEDEC trays. Inspection of large quantities and high throughput....
1 technical article »
Method for Automated Nondestructive Analysis of Flip Chip Underfill
Nov 06, 2008 | Steven R. Martell, Ameya Mandlik and Kieren Mercer.
For many years Acoustic Micro Imaging (AMI) techniques have been utilized to evaluate the quality of the underfill used to support the solder bump interconnections of Flip Chip type devices. AMI has been established as one of the few techniques that can provide reliability and quality control data, but little has been done to automate the evaluation process for Flip Chip underfill until now....
